Videoprojection blending and linear workflow
Merging videoprojection
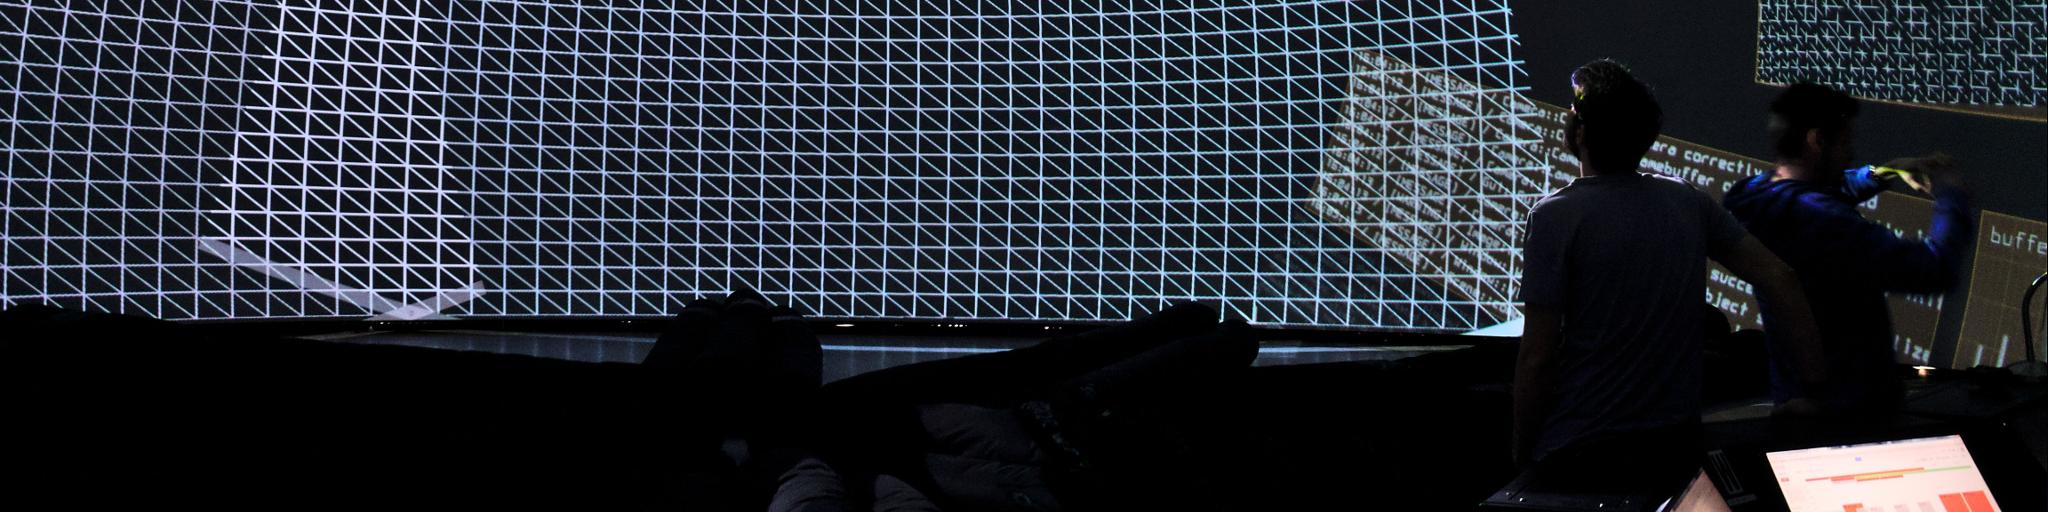
While videoprojection using a single projector can be convincing without much tuning of its brightness and colors, many issues arise when multiple projectors are involved. Of those, the first is to manage creating the illusion of a single protection and dissipate the perception of the multiple projection areas. This is the goal of videoprojection blending: to ensure a seamless transition between projection areas.
Among the many parameters to manage creating such a blending, we can name the obvious brightness and color balance of the videoprojectors. These parameters are a combination of hardware and software properties, and their respective calibration and correction has been covered in the literature1 2. An area which has not really been covered yet is how to implement these corrections in a computer graphics pipeline, and most precisely an OpenGL pipeline from the video source to the image fed to the projector.
Theoretical (non-linear) projectors
Before all, we will start with a few asumptions regarding the properties of a real, common videoprojector. As we want to focus on the pipeline which creates the final projected image, we will consider that the projectors are perfect: no deformation, uniform brightness across the projection area, and with a very standard sRGB color space. Also, the mapping is assumed to be perfect, with a 1 to 1 correspondance between the pixels from both videoprojectors.
A common way to deal with blending is to apply a S-shaped curve to the intensity of the two projectors in the overlapping area, so that the combination of both projections creates the desired final value. A simple implementation of such a correction would imply a fullscreen quad with a RGBA texture applied on it, through the following fragment shader, on each projector:
1
2
3
4
5
6
7
8
9
10
11
12
13
14
15
16
17
18
19
20
21
22
23
#version 330 core

#define SIDE 0 // 0 for left projector, 1 for right
#define BLENDSIZE 0.1 // blending size of 10% of the output size

uniform sampler2D tex;
in VertexData
{
    vec4 position;
    vec2 texCoord;
} vertexIn;

out fragColor;

void main(void)
{
    vec4 color = texture(tex, vertexIn.texCoord);
    if (SIDE == 0)
        fragColor.rgb = color.rgb * (1.0 - smoothstep(1.0 - BLENDSIZE, 1.0, vertexIn.texCoord));
    else if (SIDE == 1 && vertexIn.texCoord <= BLENDSIZE)
        fragColor.rgb = color.rgb * smoothstep(0.0, BLENDSIZE, vertexIn.texCoord);
    fragColor.a = 1.0;
}
An illustration of the resulting projection is shown in the next image: the center of the image is darker than the borders. The main reason for this fact holds in one word (sort of): sRGB.
Linear workflow to the rescue
The most common colorspace used to represent any image is sRGB, and for good reasons as it was designed to make the most out of the human vision. The sRGB model can easily be found on the Internet3, so let’s say that one particularity of this color representation model is that it is not linear but is elevated to a power of 2.2 (roughly). Take any color in the sRGB color space, multiply its channels by two, and display it (on your sRGB screen, like the vast majority of computer screens): the luminance of the displayed color will be more than twice as powerful as the color picked in the first place.
This particularity is well known in computer graphics, and it has now been some years that softwares offer ways to deal with it. This is often refered to be the term “linear workflow”, as the goal is to convert any color value to a linear colorspace (like, say, regular RGB) before doing anything with it.
As you may have guessed by now, this is what we need to do for our blending to be correct. Let’s consider a specific position, being the center position of the S-shaped curve. At this position, the luminance from both projectors has to be divided by two so that the sum of their output gives a correct image:
\[C_{projector} = \frac{C_{image}}{2}\]with \(C_{projector}\) being the projected color and \(C_{image}\) the source color before blending. If all operations are done in the sRGB colorspace, this is not at all what we get. An approximation of what we will get on each channel is:
\[C_{projector} = \left(\frac{C_{image} ^ {2.2}}{2}\right) ^{1/2.2} = C_{image} \times \frac{1}{2^{1/2.2}}\]The projected color would be, for both projectors, around 1.5 times less powerful than the unblended color although it should be half as powerful.
Luckily, their is a very simple cure to all this in OpenGL. As long as the graphic card (and the driver) supports the GL_EXT_texture_sRGB4 and GL_EXT_framebuffer_sRGB5 extensions. The first one gives the possibility to inform the driver that the data of a specific texture is stored as sRGB values. Then, when the data is loaded, colors a automatically converted to linear RGB and handled as such in the fragment shader. The second extension gives the possibility to specify that a framebuffer (like the back buffer) is meant to be sent to a sRGB display. The graphic card will then convert all values so that the final color is displayed in a linear colorspace.
Next on the list…
Hopefully this post draws the attention on issues which are not specific to projections (mapping / blending / …), as taking care of using a linear workflow is the first step toward seamless blending, and also the easiest to implement. The next subjects of interest on my list, which probably will be taken care of together, are :
- lightness calibration
- color calibration
And contrary to geometrical calibration, these two subjects are very unlikely to be done manually. But they are certainly doable nonetheless.
-
Brandon B. May, Nathan D. Cahill., Mitchell R. Rosen, “Calibration of a Multi-Projector System for Display on a Cylindrical Surface”, 2010 WNYIPW. ↩
-
https://www.opengl.org/registry/specs/EXT/texture_sRGB.txt ↩
-
https://www.opengl.org/registry/specs/EXT/framebuffer_sRGB.txt ↩